Biscoff Cookie Butter Cheesecake Recipe
Introduction
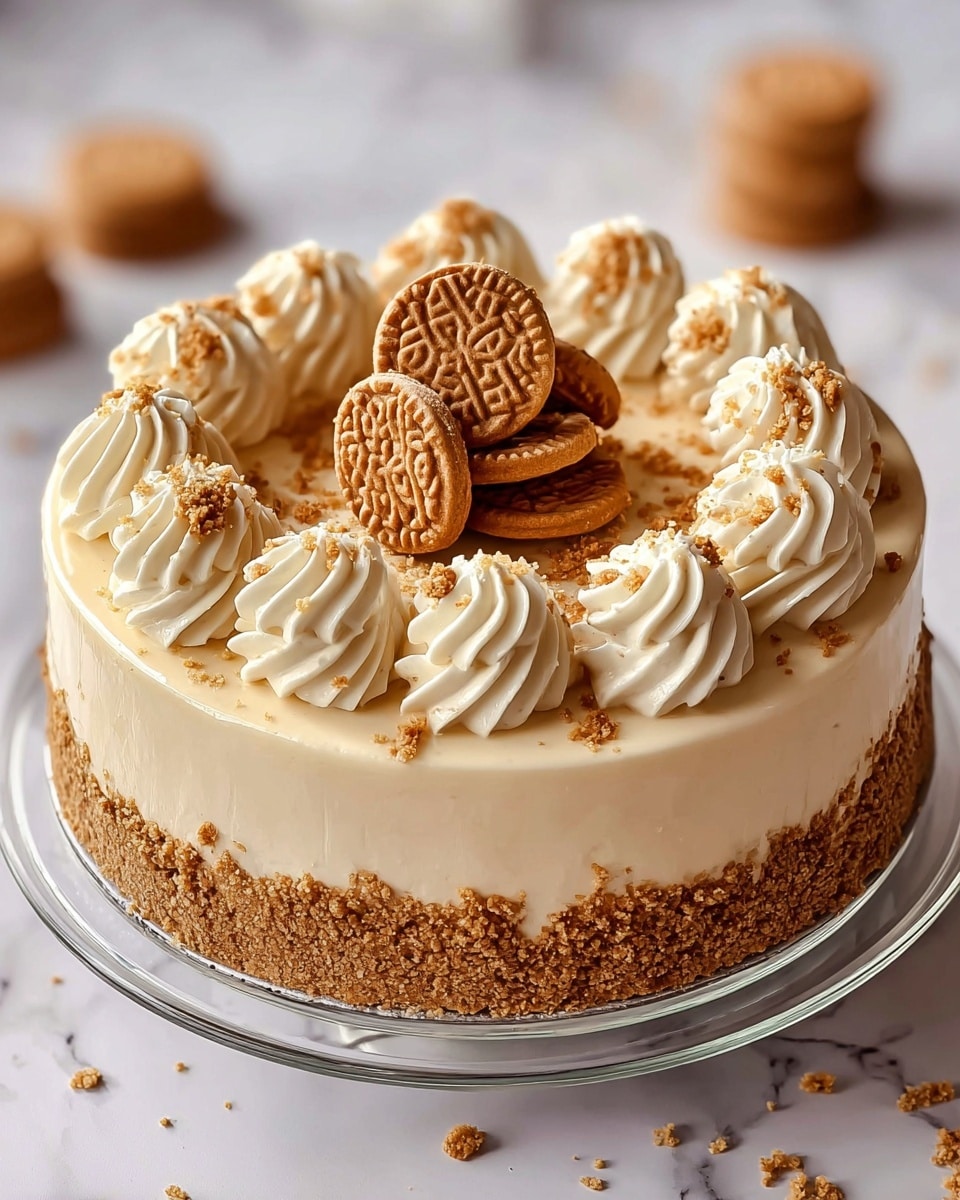
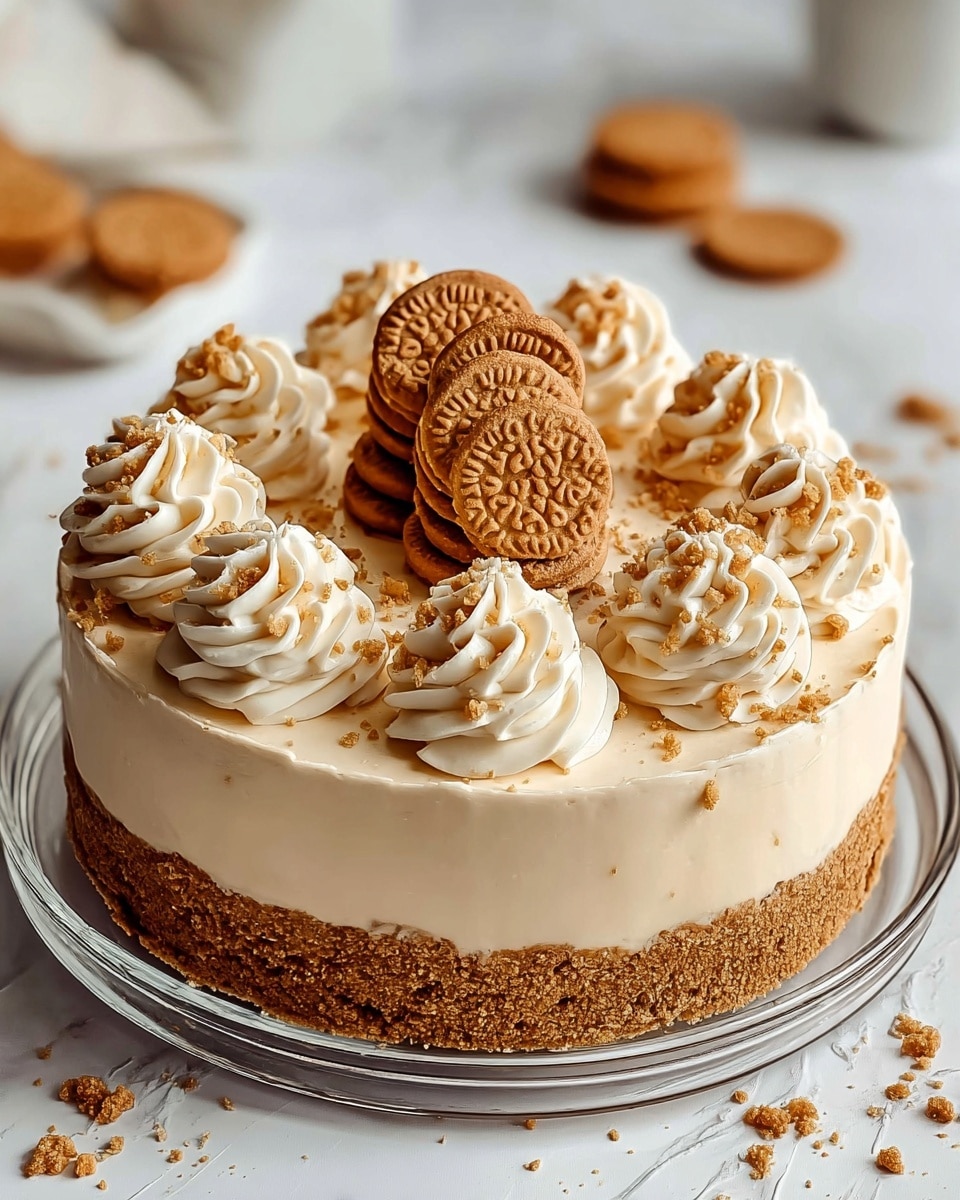
Biscoff Cookie Butter Cheesecake is a delightful fusion of creamy cheesecake and the warm, spiced flavor of Biscoff cookies. With a crunchy cookie crust and a rich, smooth filling infused with cookie butter, this dessert offers a perfect balance of sweetness and spice. It’s an indulgent treat that’s surprisingly easy to make and sure to impress at any occasion.
Ingredients
- 2 cups Biscoff cookies, crushed (for crust)
- 6 tablespoons melted butter
- 3 (8 oz) packages cream cheese, softened
- 1 cup granulated sugar
- 1 cup Biscoff cookie butter
- 3 large eggs
- 1 teaspoon vanilla extract
- 1/2 cup sour cream
- 1/4 teaspoon salt
- Extra cookie crumbs and melted cookie butter (for topping)
Instructions
- Step 1: Preheat your oven to 325°F (163°C). Line a springform pan with parchment paper for easy removal.
- Step 2: In a bowl, mix the crushed Biscoff cookies with melted butter until well combined. Press the mixture firmly into the bottom of the pan to form the crust. Bake for 8 minutes, then let it cool.
- Step 3: In a large mixing bowl, beat the softened cream cheese with sugar until smooth and creamy.
- Step 4: Add the Biscoff cookie butter to the cream cheese mixture and blend until fully incorporated.
- Step 5: Beat in the eggs one at a time, mixing well after each addition. Then stir in vanilla extract, sour cream, and salt until combined.
- Step 6: Pour the cheesecake filling over the cooled crust, smoothing the top with a spatula.
- Step 7: Bake for 50–60 minutes, or until the center is slightly jiggly but set around the edges.
- Step 8: Turn off the oven, crack the door open, and let the cheesecake cool inside for 1 hour to prevent cracking.
- Step 9: Refrigerate the cheesecake for at least 4 hours or preferably overnight to set completely.
- Step 10: Before serving, drizzle melted cookie butter over the top and sprinkle with extra crushed cookie crumbs for added texture and flavor.
Tips & Variations
- For a smoother batter, ensure all dairy ingredients are at room temperature before mixing.
- Use a water bath while baking or place a pan of hot water in the oven to keep the cheesecake moist and prevent cracks.
- For a lighter version, substitute reduced-fat cream cheese and use Greek yogurt in place of sour cream.
- Try adding a swirl of chocolate ganache or caramel sauce into the filling for extra indulgence.
- Gluten-free Biscoff-style cookies can be used to make this cheesecake suitable for gluten-sensitive diets.
- Warm the cookie butter slightly before drizzling on top to achieve perfect, flowing drips.
Storage
Store the cheesecake covered in the refrigerator for up to 4 days. To reheat, bring slices to room temperature or warm gently in a microwave on low power for a few seconds. Leftover cheesecake can also be frozen for up to 1 month; thaw overnight in the fridge before serving.
How to Serve
Serve this delicious recipe with your favorite sides.
FAQs
Can I make this cheesecake without Biscoff cookies?
You can substitute the Biscoff cookies with graham crackers or any spiced cookie, but the signature caramel-spiced flavor will be different.
Why is my cheesecake cracking on top?
Cracks often form if the oven temperature is too high or if the cheesecake cools too quickly. Bake slowly at a moderate temperature, and let the cheesecake cool gradually in the oven with the door cracked to avoid cracking.
PrintBiscoff Cookie Butter Cheesecake Recipe
Biscoff Cookie Butter Cheesecake is a luscious dessert combining a spiced Biscoff cookie crust with a creamy, smooth cheesecake filling infused with rich Biscoff cookie butter. This indulgent cheesecake features a perfectly baked crust and a silky filling enhanced with vanilla and sour cream for balanced sweetness and subtle tang, topped with melted cookie butter and extra cookie crumbs for an irresistible finish.
- Prep Time: 20 minutes
- Cook Time: 60 minutes
- Total Time: 6 hours
- Yield: 12 slices 1x
- Category: Dessert
- Method: Baking
- Cuisine: European
Ingredients
Crust
- 2 cups Biscoff cookies, crushed
- 6 tablespoons melted butter
Filling
- 3 (8 oz) packages cream cheese, softened
- 1 cup granulated sugar
- 1 cup Biscoff cookie butter
- 3 large eggs
- 1 teaspoon vanilla extract
- 1/2 cup sour cream
- 1/4 teaspoon salt
Topping
- Extra cookie crumbs
- Melted cookie butter
Instructions
- Prepare crust: Preheat your oven to 325°F (163°C) and line a springform pan with parchment paper. In a bowl, combine crushed Biscoff cookies with melted butter, mixing until fully combined. Press this mixture firmly into the bottom of the prepared pan to form an even crust. Bake the crust for 8 minutes to set, then remove and allow to cool.
- Make filling: In a large mixing bowl, beat softened cream cheese and granulated sugar together until smooth and creamy. Add the Biscoff cookie butter and blend until fully incorporated. One at a time, beat in the eggs ensuring each is fully mixed before adding the next. Then, mix in vanilla extract, sour cream, and salt until just combined and smooth.
- Assemble and bake: Pour the prepared filling evenly over the cooled crust, smoothing the top with a spatula. Bake the cheesecake at 325°F (163°C) for 50 to 60 minutes, or until the center is slightly jiggly but set. This ensures a creamy but stable texture.
- Cool gradually: Once baking is done, turn off the oven and crack the oven door open. Leave the cheesecake inside the oven to cool for 1 hour slowly, which helps prevent cracks from forming due to rapid temperature changes.
- Chill: Transfer the cheesecake to the refrigerator and chill for at least 4 hours, preferably overnight. This chilling time allows the cheesecake to fully set and develop its flavors and creamy texture.
- Serve: Before serving, warm some cookie butter slightly until runny, then drizzle it generously over the cheesecake. Sprinkle extra crushed Biscoff cookies on top to add texture and enhance visual appeal. Slice and enjoy!
Notes
- Use room temperature cream cheese and eggs for best texture and a smooth filling.
- Baking the crust prior to filling prevents sogginess and adds a pleasant crispness.
- Cooling the cheesecake gradually inside the oven helps prevent cracks on the surface.
- For a gluten-free version, use gluten-free Biscoff-style cookies.
- Substitute sour cream with Greek yogurt for a lighter tangy flavor and lower fat content.
- Try adding a swirl of chocolate ganache or caramel sauce for extra flavor dimensions.
- Allow cheesecake to chill overnight for optimal flavor and texture.
- When drizzling cookie butter topping, heat it just enough to make it pourable but not too hot to melt the cheesecake surface.
Keywords: Biscoff cheesecake, cookie butter dessert, Biscoff cookie cheesecake, creamy cheesecake, spiced cookie crust, no crack cheesecake