Melt-in-Mouth Peppermint Swirl Cookies – Holiday Perfection Recipe
Introduction
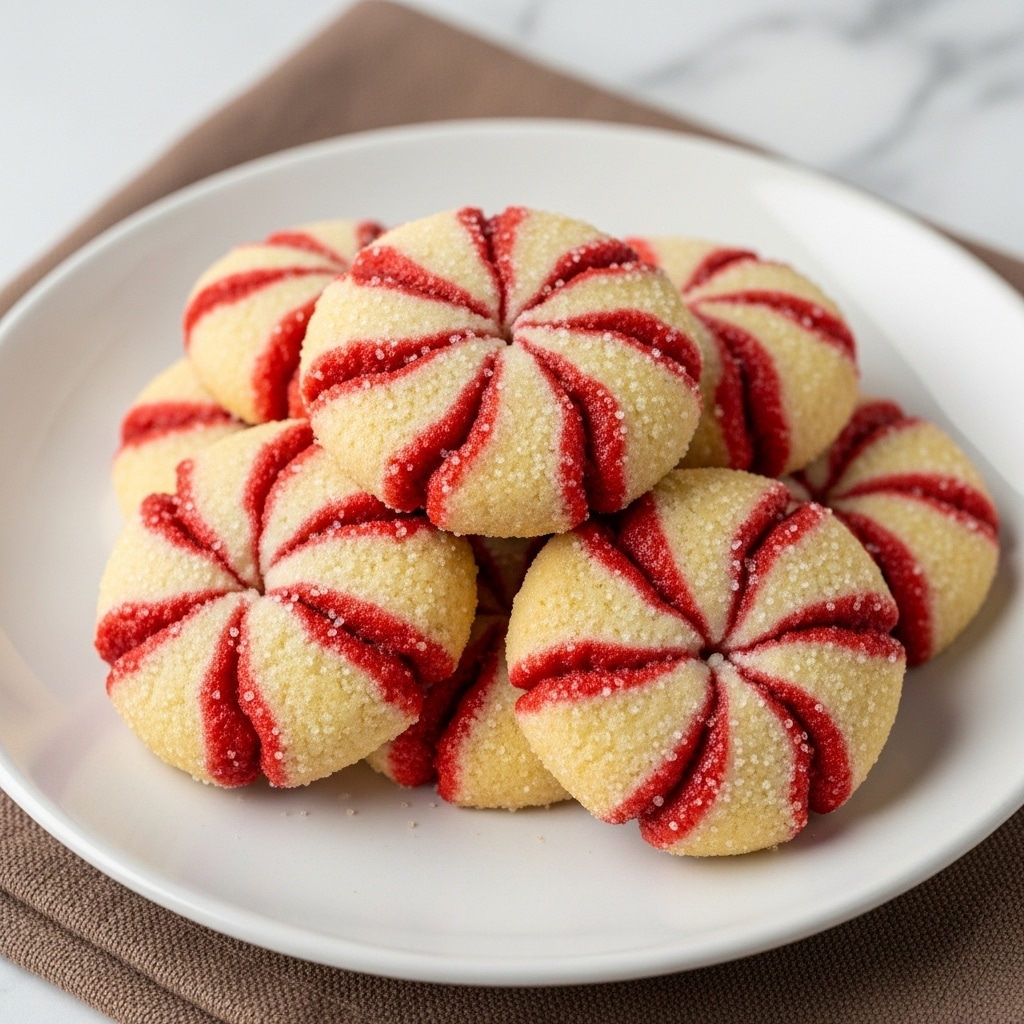
These Melt-in-Mouth Peppermint Swirl Cookies are a festive holiday delight, combining tender, buttery cookie dough with a refreshing hint of peppermint and a stunning red and white swirl. Perfect for holiday gatherings or cozy evenings, these cookies are sure to impress both in flavor and appearance.
Ingredients
- 2 ½ cups (300g) all-purpose flour, plus more for dusting
- 1 teaspoon baking powder
- ½ teaspoon salt
- 1 cup (226g) unsalted butter, softened to room temperature
- 1 ½ cups (300g) granulated sugar
- 2 large eggs, at room temperature
- 2 teaspoons pure vanilla extract
- ½ teaspoon pure peppermint extract, or more to taste
- Red gel food coloring
- For the optional glaze and decoration:
- 1 cup (120g) powdered sugar, sifted
- 2 tablespoons milk or heavy cream
- ¼ teaspoon pure vanilla extract
- ¼ teaspoon pure peppermint extract
- 2-3 candy canes, crushed into small pieces
Instructions
- Step 1: In a medium bowl, whisk together the flour, baking powder, and salt until evenly combined. Set aside.
- Step 2: In a stand mixer fitted with a paddle attachment, beat the softened butter and granulated sugar on medium-high for 3 to 5 minutes until light and fluffy.
- Step 3: Reduce mixer speed to low. Add eggs one at a time, mixing well after each and scraping down the sides. Then add vanilla and peppermint extracts.
- Step 4: Gradually add the dry ingredients to the wet mixture in thirds, mixing only until just combined to avoid overworking the dough.
- Step 5: Divide dough into two equal parts. Add red gel food coloring and additional peppermint extract to one half and mix gently until uniformly colored. Leave the other half plain.
- Step 6: Flatten each dough half into a disc, wrap tightly in plastic wrap, and chill for at least 1 hour.
- Step 7: Lightly flour your work surface and rolling pin. Roll each disc between parchment paper into 12×10 inch rectangles about ¼ inch thick.
- Step 8: Place one dough rectangle on the work surface, then invert the second dough piece on top. Press gently to adhere.
- Step 9: Starting from a long side, roll the layered dough tightly into a cylindrical log. Wrap in plastic wrap and chill for at least 2 hours or overnight.
- Step 10: Preheat oven to 375°F (190°C). Line baking sheets with parchment paper.
- Step 11: Using a sharp knife, slice the chilled dough log into ¼ inch thick rounds. Arrange cookies 1 inch apart on baking sheets.
- Step 12: Bake for 8 to 11 minutes until edges are lightly golden but centers remain soft. Cool on baking sheets for 5 minutes, then transfer to a wire rack to cool completely.
- Step 13: (Optional) Prepare glaze by whisking powdered sugar with milk or cream, vanilla, and peppermint extracts until smooth. Drizzle or dip cooled cookies and immediately sprinkle with crushed candy canes. Let glaze set before serving or storing.
Tips & Variations
- Use gel food coloring for vibrant red without adding moisture.
- Chill the dough thoroughly to achieve well-defined swirls and prevent spreading.
- Slice dough with a very sharp knife; chill again if slices become too soft while cutting.
- For a gluten-free version, substitute a 1:1 gluten-free flour blend containing xanthan gum.
- Try drizzling melted white or dark chocolate over cooled cookies for an extra indulgence.
- Add almond extract to the plain dough half for a subtle marzipan flavor.
Storage
Store completely cooled cookies in an airtight container at room temperature for 5 to 7 days. If glazed, ensure the glaze is fully set before stacking to prevent sticking. Unbaked dough logs can be wrapped tightly and frozen for up to 3 months. Baked, undecorated cookies freeze well for 2 to 3 months; thaw before decorating or serving.
How to Serve

Serve this delicious recipe with your favorite sides.
FAQs
Can I use liquid food coloring instead of gel?
Gel food coloring is preferred because it provides more vivid color without adding extra liquid that could affect dough consistency. However, if using liquid coloring, use sparingly and adjust flour slightly if the dough becomes too soft.
Why is chilling the dough so important?
Chilling relaxes gluten, firms the dough for easier rolling and slicing, and prevents cookie spreading during baking. It also helps maintain the distinct swirl pattern, ensuring beautiful, professional-looking cookies.
PrintMelt-in-Mouth Peppermint Swirl Cookies – Holiday Perfection Recipe
These Melt-in-Mouth Peppermint Swirl Cookies are a festive holiday masterpiece featuring tender, buttery cookies with a refreshing peppermint flavor and a stunning red and white swirl pattern. Perfect for holiday gatherings, gifts, or cozy treats, these cookies combine a delicate texture with vibrant visual appeal and optional peppermint glaze and crushed candy cane decorations.
- Prep Time: 45 minutes
- Cook Time: 10 minutes
- Total Time: 55 minutes
- Yield: 36–48 cookies 1x
- Category: Dessert
- Method: Baking
- Cuisine: American
Ingredients
For the Peppermint Swirl Cookie Dough:
- 2 ½ cups (300g) all-purpose flour, plus more for dusting
- 1 teaspoon baking powder
- ½ teaspoon salt
- 1 cup (226g) unsalted butter, softened to room temperature
- 1 ½ cups (300g) granulated sugar
- 2 large eggs, at room temperature
- 2 teaspoons pure vanilla extract
- ½ teaspoon pure peppermint extract (plus additional ½ teaspoon for red dough)
- Red gel food coloring, as needed for vibrant red hue
For the Glaze and Decoration (Optional):
- 1 cup (120g) powdered sugar, sifted
- 2 tablespoons milk or heavy cream
- ¼ teaspoon pure vanilla extract
- ¼ teaspoon pure peppermint extract
- 2–3 candy canes, crushed into small pieces
Instructions
- Combine Dry Ingredients: In a medium bowl, whisk together the all-purpose flour, baking powder, and salt for about 30 seconds to evenly distribute. Set aside.
- Cream Butter and Sugar: Using a stand mixer fitted with the paddle attachment or a hand mixer, beat softened butter and granulated sugar on medium-high speed for 3 to 5 minutes until light and fluffy, incorporating air for tender cookies.
- Add Eggs and Extracts: Reduce mixer speed to low, add eggs one at a time, mixing well after each, scraping the bowl. Add vanilla and peppermint extracts, mixing to combine.
- Incorporate Dry Ingredients: Gradually add dry ingredients in thirds while on low speed, mixing only until just combined to avoid overmixing and tough cookies.
- Divide and Color Dough: Split dough in half. To one half, add peppermint extract and red gel food coloring, knead or mix gently until uniform and vibrant. Leave other half plain.
- Chill Dough: Flatten each half into discs, wrap in plastic wrap, refrigerate at least 1 hour to relax gluten and prevent spreading.
- Roll Out Doughs: Lightly flour work surface or use parchment paper. Roll each dough disc separately into 12×10-inch rectangles, about ¼ inch thick. Remove top parchment layer.
- Layer and Roll Dough: Place one dough rectangle on surface, invert the second atop it, peel off top parchment, gently press to adhere. Starting at a long side, roll tightly into a firm log, smoothing and trimming ends to uniform thickness.
- Second Chill: Wrap dough log tightly in plastic wrap, refrigerate at least 2 hours or overnight to firm dough for clean slicing.
- Preheat Oven and Prepare Baking Sheets: Preheat oven to 375°F (190°C). Line baking sheets with parchment paper.
- Slice Cookies: Slice chilled dough log into ¼-inch thick rounds using a sharp knife with gentle sawing motion if needed to preserve swirl pattern.
- Bake Cookies: Place slices 1 inch apart on baking sheets. Bake 8-11 minutes until edges are lightly golden and centers set. Monitor closely to avoid over-browning.
- Cool Cookies: Cool on baking sheets for 5 minutes, then transfer to wire racks to cool completely to retain texture and prevent sogginess.
- Optional Glaze and Decoration: Whisk powdered sugar with milk or cream, vanilla, and peppermint extracts until smooth. Drizzle or dip cooled cookies, immediately sprinkle crushed candy canes on top. Let glaze set 30-60 minutes.
Notes
- Always measure flour accurately using a kitchen scale or spoon and level method to avoid dry, crumbly dough.
- Chilling dough twice is critical for easy handling, minimal spreading, and perfect swirl pattern.
- Use gel food coloring for vibrant red without adding moisture.
- Roll dough to consistent ¼-inch thickness for even baking.
- Roll dough log tightly to create distinct swirls; avoid air pockets.
- Use a very sharp knife for clean slices; chill dough again if it softens while slicing.
- Watch cookies in the oven closely near end of baking time to prevent over-browning.
- Store cooled cookies in airtight containers for 5-7 days; freeze dough log up to 3 months or baked cookies up to 2-3 months.
- Optional glaze and candy cane topping enhance flavor and appearance but can be omitted.
- For gluten-free option, substitute all-purpose flour with a 1:1 gluten-free blend containing xanthan gum.
Keywords: peppermint swirl cookies, holiday cookies, peppermint cookies, swirl cookies, festive cookies, peppermint dessert, Christmas cookies, peppermint glaze, holiday baking